
Step-by-Step Guide: How to Install Car AC Compressors for Optimal Cooling Efficiency

Installing a car A/C compressor can be a daunting task, but with the help of A-Premium's comprehensive guide, you can successfully install your car A/C compressor with step-by-step instructions, valuable tips, and expert advice.
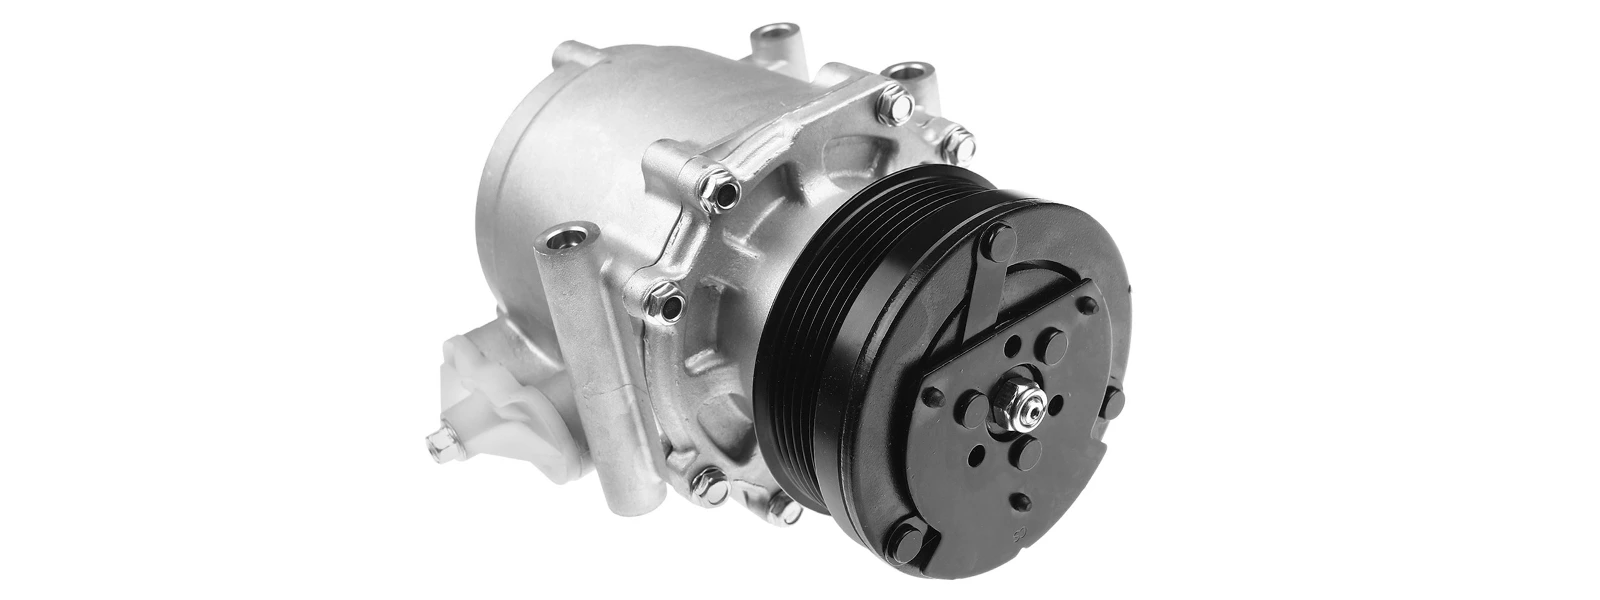
Suggested A-Premium Parts


If you're looking to keep your car cool and comfortable during the hot summer months, then you know how important it is to have a functioning air conditioning (AC) system. One of the most critical components of your car's AC system is the compressor, which is responsible for compressing and circulating refrigerant throughout the system. Without a properly functioning compressor, your AC system won't be able to cool your car efficiently, leaving you feeling hot and uncomfortable on your daily commute. In this step-by-step guide, we'll walk you through the process of installing a car AC compressor for optimal cooling efficiency. So, whether you're a seasoned DIY mechanic or a newbie looking to save some money on repairs, read on to learn how to install a car AC compressor like a pro.

Step 1: Gather Necessary Tools and Supplies
Before you get started, it's essential to have all the necessary tools and supplies on hand to make the installation process go smoothly. Here's what you'll need:
- Wrench set
- Socket set
- Ratchet
- Screwdriver
- AC system flush
- Replacement compressor
- Replacement receiver drier or accumulator
- Replacement orifice tube or expansion valve
- Refrigerant oil
- Refrigerant
Make sure to gather all of these items before you begin the installation process to avoid any frustrating delays or interruptions. Once you have everything you need, you'll be ready to move on to the next step and get your car's AC system up and running like new again.
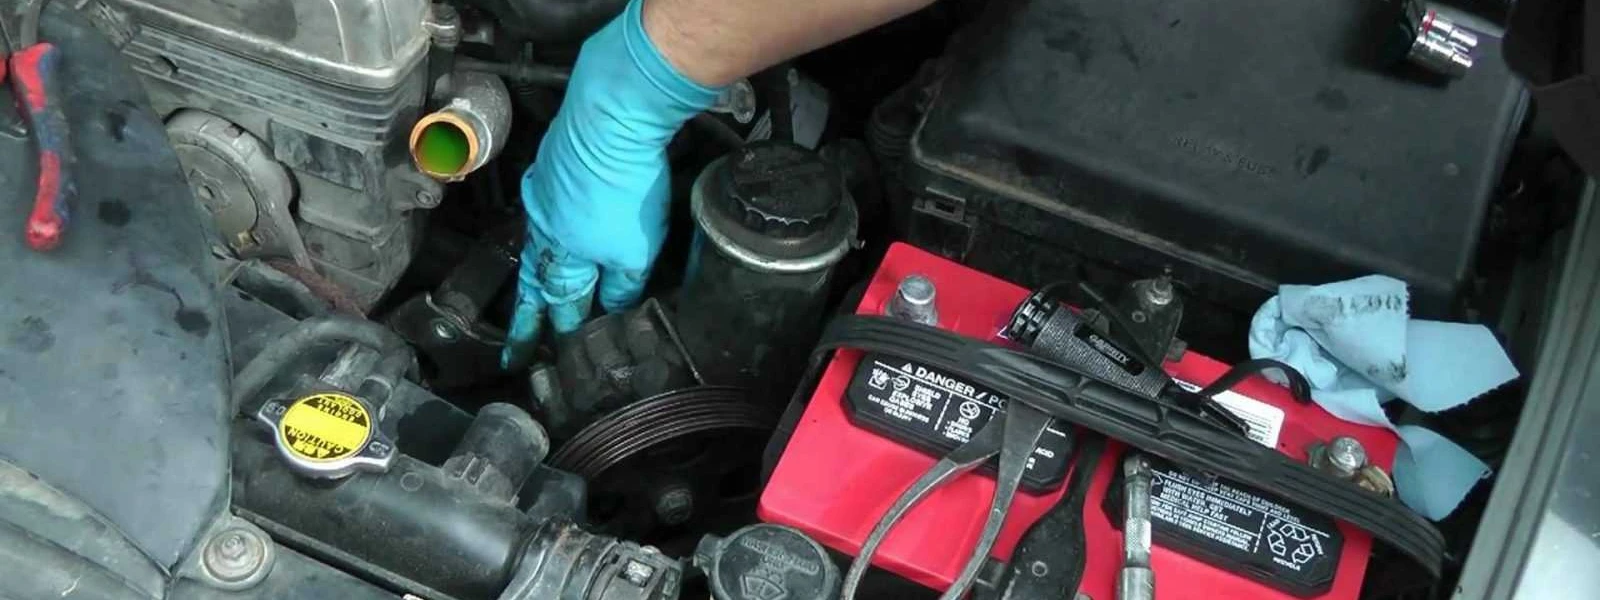
Step 2: Remove Old Compressor
Now that you have all of the necessary tools and supplies, it's time to remove the old compressor. This step requires some caution and attention to detail to avoid damaging other car components. Here's how to do it:
- Locate the compressor in your car's engine compartment. It's usually located on the front of the engine block.
- Use your wrench or socket set to disconnect the refrigerant lines from the compressor. Be sure to wear gloves and eye protection to avoid contact with refrigerant.
- Remove any bolts or screws that are holding the compressor in place. Keep track of these bolts, as you'll need them later when installing the new compressor.
- Carefully remove the old compressor from the engine compartment, making sure not to damage any surrounding components.
By following these steps, you should be able to safely remove the old compressor from your car. Remember to take your time and be gentle with the components to avoid causing any damage. With the old compressor removed, you're ready to move on to the next step: preparing the new compressor for installation.
Step 3: Prepare New Compressor
Congratulations, you've made it to Step 3! Before you can install your new compressor, it's essential to prepare it properly. This step involves adding oil and refrigerant to the new compressor, which helps to ensure its longevity and optimal function.
1. Choose the Right Type of Refrigerant and Oil
Before you can start adding oil and refrigerant, it's important to select the right type for your car's AC system. The most common types of refrigerant are R-134a and R-12. It's best to consult your car's owner's manual or a professional mechanic to determine the correct type for your vehicle.
It's essential to choose the right type of oil for your compressor. The two most common types are PAG (Polyalkylene Glycol) and Mineral oil. Again, consult your car's owner's manual or a professional mechanic to ensure you use the correct type of oil.
2. Add Oil to the New Compressor
Once you have the correct type of oil, it's time to add it to the new compressor. To do this, locate the oil fill port, which is usually found near the top of the compressor. Unscrew the cap and fill the compressor with the recommended amount of oil, which can vary depending on the make and model of your car. Be sure to use a funnel to prevent any oil spillage.
3. Add Refrigerant to the New Compressor
After you have added the oil, it's time to add the refrigerant. Begin by connecting the refrigerant hose to the low-pressure port on the compressor. This port is usually located near the oil fill port.
Next, you need to vacuum the new compressor for at least 30 minutes to remove any air or moisture. After the vacuuming process is complete, you can start adding the refrigerant. Be sure to add the correct amount, which can vary depending on your car's make and model.
4. Double-check Everything
Once you have added the oil and refrigerant, double-check everything. Ensure that the oil fill port and the refrigerant hose are tightly closed. Additionally, make sure that you have added the recommended amount of oil and refrigerant.
Step 4: Install New Compressor
Now that you have prepared your new compressor, it's time to install it. Follow these steps to ensure a smooth and successful installation:
1. Position the Compressor
Carefully position the new compressor in its designated location. Make sure it's aligned properly with the other components of the AC system. You may need to refer to your car's owner's manual or a professional mechanic for guidance on proper positioning.
2. Mount the Compressor
Securely mount the compressor in place using the appropriate bolts and brackets. Make sure the bolts are tightened to the manufacturer's specifications. Overtightening can damage the compressor, while under-tightening can cause it to vibrate and lead to leaks.
3. Connect Hoses and Electrical Connections
Connect the hoses and electrical connections to the new compressor. Use new O-rings to ensure a tight seal. Make sure the hoses are connected to their designated ports and that the electrical connections are secure and properly grounded.
4. Add Additional Components
Depending on your car's AC system, you may need to add additional components to the new compressor, such as a clutch or pulley. Follow the manufacturer's instructions carefully to ensure proper installation.
5. Double-check Everything
Before you start the engine, double-check everything to ensure that all connections are secure, and all bolts are tightened to the correct specifications. It's also a good idea to inspect the entire AC system for any signs of damage or wear and tear.
6. Test the AC System
Once you've installed the new compressor, it's time to test the entire AC system. Start the engine and turn on the AC to its highest setting. Check for any unusual noises, leaks, or vibrations. Also, check the cooling efficiency of the system by measuring the temperature of the air blowing out of the vents. If everything looks good, you're ready to enjoy a comfortable and cool ride!

Step 5: Test the AC System
Now that you have installed your new compressor, it's essential to test the entire AC system to ensure its optimal performance. Here are the steps to follow:
1. Inspect for Leaks
The first step in testing your AC system is to inspect it for leaks. Check all the connections, hoses, and fittings for signs of leakage. You can use an electronic leak detector or a UV dye kit to detect any leaks. If you find any leaks, you must address them before proceeding further.
2. Charge the System
Next, you need to charge the AC system with refrigerant. Follow the manufacturer's instructions carefully to ensure that you add the correct amount of refrigerant. Overcharging or undercharging the system can cause it to malfunction and reduce its efficiency.
3. Measure Cooling Efficiency
Once you have charged the system with refrigerant, measure the cooling efficiency of the AC system. You can use a thermometer to measure the temperature of the air blowing out of the vents. Ideally, the temperature should be between 35 and 50 degrees Fahrenheit.
4. Check for Unusual Noises or Vibrations
While testing the AC system, listen for any unusual noises or vibrations. These can be signs of a malfunctioning compressor or other components. If you notice any unusual noises or vibrations, you must address them immediately.
5. Troubleshoot Any Problems
If you encounter any problems during the testing process, troubleshoot them. Consult your car's owner's manual or seek professional help if necessary. Common problems include leaks, low refrigerant levels, and malfunctioning components.
FAQ about how to install car AC compressors
Q: How do I know if my compressor needs to be replaced?
A: There are several signs that your car's AC compressor may need to be replaced. Here are a few indicators to look out for:
- Warm Air Blowing Out of the AC System
- Unusual Noises or Vibrations
- Leaks
- Reduced Cooling Efficiency
If you experience any of these signs, it's important to have your car's AC system checked by a professional mechanic. They can diagnose the problem and determine if the compressor needs to be replaced or if there are other issues with the AC system that need to be addressed
Q: How often should I replace my car's AC compressor?
A: Knowing when to replace your car's AC compressor can be challenging. Generally speaking, a properly functioning AC compressor can last for several years. However, there are several factors to consider that can affect its lifespan, including the quality of the compressor, how often you use your AC system, and the climate you live in. If you notice any signs of trouble with your AC system, such as warm air blowing out instead of cool air, unusual noises or vibrations, or leaks, it's essential to have it checked by a professional mechanic. They can diagnose the problem and determine if the compressor needs to be replaced or if there are other issues with the AC system that need to be addressed.

It's a good idea to have your AC system serviced regularly, which can help prolong the life of your compressor and other components. Regular maintenance can also ensure that your AC system operates efficiently and reliably, which can save you money on energy costs and prevent more costly repairs down the road. In general, it's best to follow the manufacturer's recommendations for servicing your car's AC system. However, if you notice any signs of trouble, it's always a good idea to have it checked by a professional mechanic as soon as possible to prevent further damage and ensure that your AC system provides optimal cooling efficiency.
Q: What do I do if there's a refrigerant leak after installing the new compressor?
A: If you notice a refrigerant leak after installing a new compressor, you should identify the source of the leak and address it by tightening connections or replacing damaged components. Use new O-rings to ensure a tight seal. Recharge the AC system with refrigerant after addressing the leak. If you're not confident in your ability to fix the leak, take your car to a professional mechanic. They can diagnose and fix the problem to keep your AC system running efficiently and prevent further damage.
In conclusion, a functioning AC compressor is essential for optimal cooling efficiency in your car. If you're experiencing issues with your AC system, it may be necessary to replace the compressor. Installing a new compressor involves several steps, including gathering the necessary tools and supplies, removing the old compressor, preparing the new compressor, installing it, and testing the AC system. By following each step carefully, you can ensure that the new compressor operates efficiently and reliably.


