How to replace a crankshaft position sensor?

Step-by-step process for replacing a crankshaft position sensor with our easy-to-follow guide
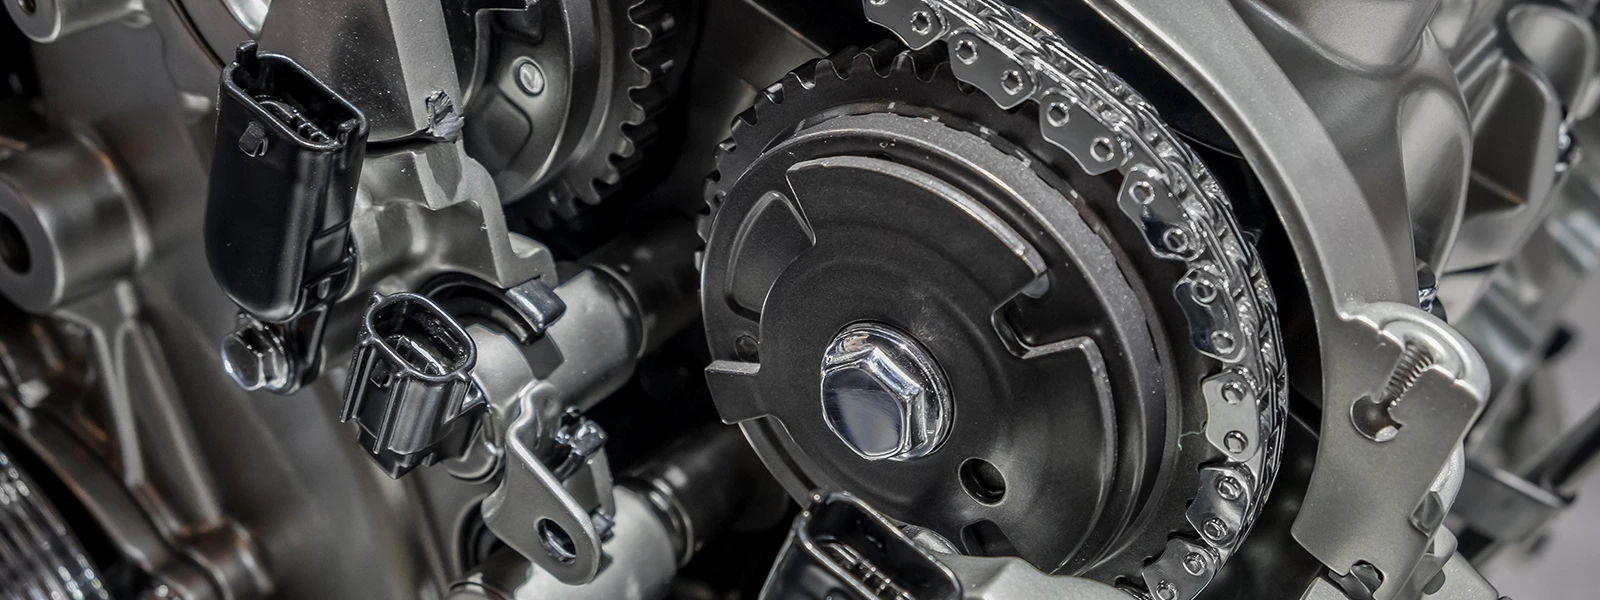

In the intricate web of automotive mechanics, every component plays a pivotal role in the symphony of your vehicle's performance. Among these, the crankshaft position sensor stands as a silent sentinel, orchestrating the harmony of your engine's operations. Maintaining the crankshaft position sensor regularly helps prevent potential issues and ensures that your engine operates optimally. And the timely replacement of a faulty crankshaft position sensor is essential to restore optimal engine performance. It's a preventive step that safeguards your vehicle's functionality and your safety on the road.

Signs that you may need a new crankshaft position sensor: Symptoms of a bad crankshaft position sensor
Recognizing the signs of a failing crankshaft position sensor is crucial for addressing issues before they lead to more significant problems. Refer to the following signs that may indicate you may need to replace your crankshaft position sensor.
- Engine Stalling or Hesitation
If your engine stalls shortly after starting or while idling, or if you experience hesitation during acceleration, it could be due to an erratic signal from the sensor. The ECU relies on accurate data from the sensor to adjust fuel and ignition timing.
- Rough Idling
A malfunctioning sensor can disrupt the engine's idle speed control, causing the engine to idle roughly or inconsistently.
- Difficulty Starting
If your engine struggles to start, especially in extreme temperatures, it could be a sign of a faulty sensor. The sensor provides essential information for proper ignition timing during the starting process.
- Reduced Fuel Efficiency
A bad crankshaft position sensor can lead to incorrect fuel injection timing, resulting in decreased fuel efficiency and poor mileage.
- Misfires
Cylinder misfires can occur due to improper ignition timing caused by inaccurate sensor readings. This can lead to poor engine performance, increased exhaust emissions, and reduced power.
- Sudden Loss of Power
If the sensor fails abruptly while driving, the ECU may not receive accurate data about the crankshaft's position, causing the engine to lose power unexpectedly.
- Check Engine Light
The check engine light (or similar warning light) on your dashboard might illuminate due to sensor-related issues. The ECU detects irregular sensor signals and triggers a warning to alert you to a potential problem.
- Unusual Engine Noises
In some cases, a malfunctioning sensor can lead to irregular engine timing, resulting in unusual noises like knocking or pinging.
- Erratic RPM Readings
If you notice the tachometer (RPM gauge) behaving erratically or showing inconsistent readings, the crankshaft position sensor might be to blame.
- Poor Acceleration and Performance
A malfunctioning sensor can disrupt the engine's timing, leading to sluggish acceleration and overall poor engine performance.
- Transmission Issues
In vehicles with automatic transmissions, a failing crankshaft position sensor can affect the transmission's shifting patterns, leading to jerky or irregular gear changes.
- Ignition Problems
Problems with the ignition system, such as difficulty starting the engine or frequent stalls, can often be attributed to a malfunctioning crankshaft position sensor.
If you notice any of these signs, it's recommended to have your vehicle inspected, by a qualified mechanic when necessary. Ignoring the signs of a faulty sensor can lead to more severe problems and potentially dangerous situations. Once you're sure that crankshaft position sensor replacement is the solution, you can proceed by referring to the step-by-step replacement guide below.
Replacing crankshaft position sensor step by step
Step 1: Prepare the Vehicle
Park your vehicle in a safe, well-lit area and engage the parking brake. Ensure you have the necessary tools and replacement sensor ready.
Here's a table listing the tools and materials that may needed for a crankshaft position sensor replacement:
|
Tools |
Materials |
|
Socket Set |
New Crankshaft Position Sensor |
|
Wrench Set |
Wiring Harness Connectors |
|
Screwdrivers |
Replacement Fasteners |
|
Pliers |
Anti-Seize Lubricant |
|
Torque Wrench |
Electrical Tape |
|
Jack Stands or Ramps |
Cleaning Supplies |
|
Battery Terminal Wrench |
Safety Gloves |
|
Diagnostic Scan Tool (optional) |
Safety Glasses |
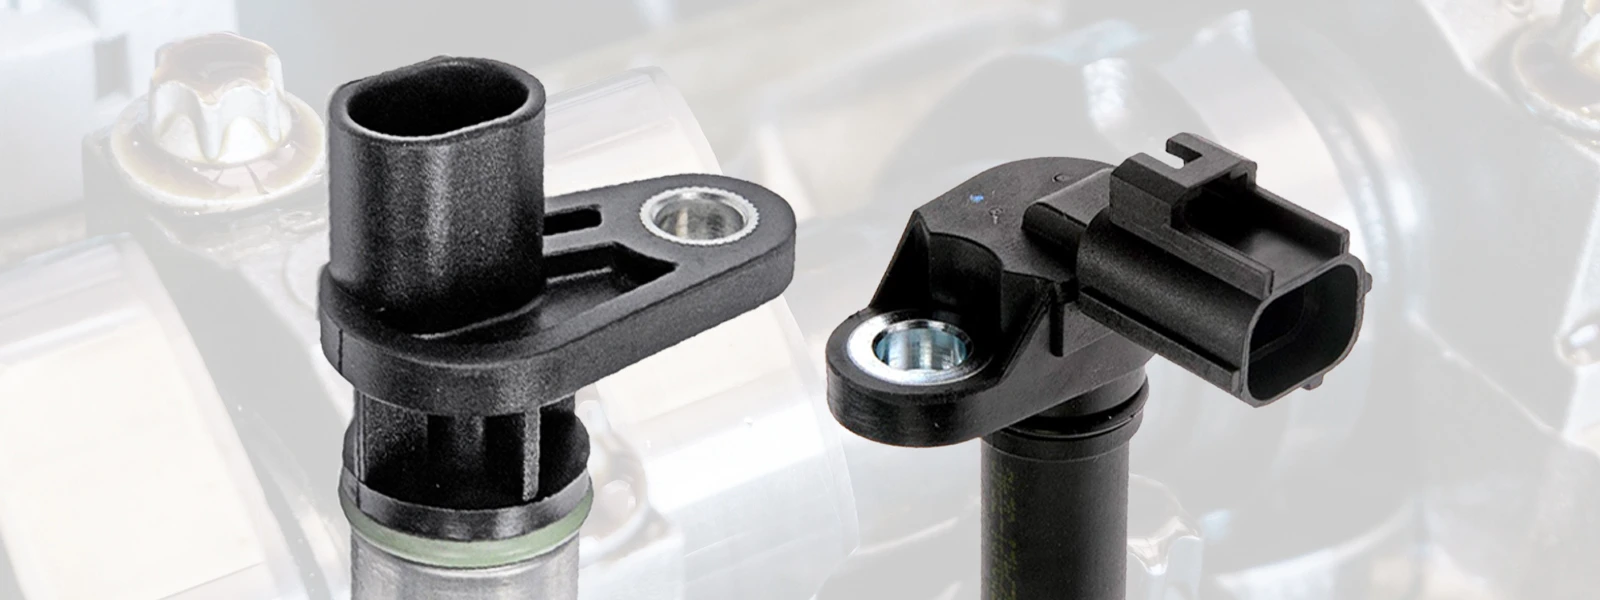
Step 2: Locate the Crankshaft Position Sensor
Refer to your vehicle's manual to find the location of the crankshaft position sensor. Generally, it's near the engine's crankshaft. Take note of any components you need to remove to access the sensor.
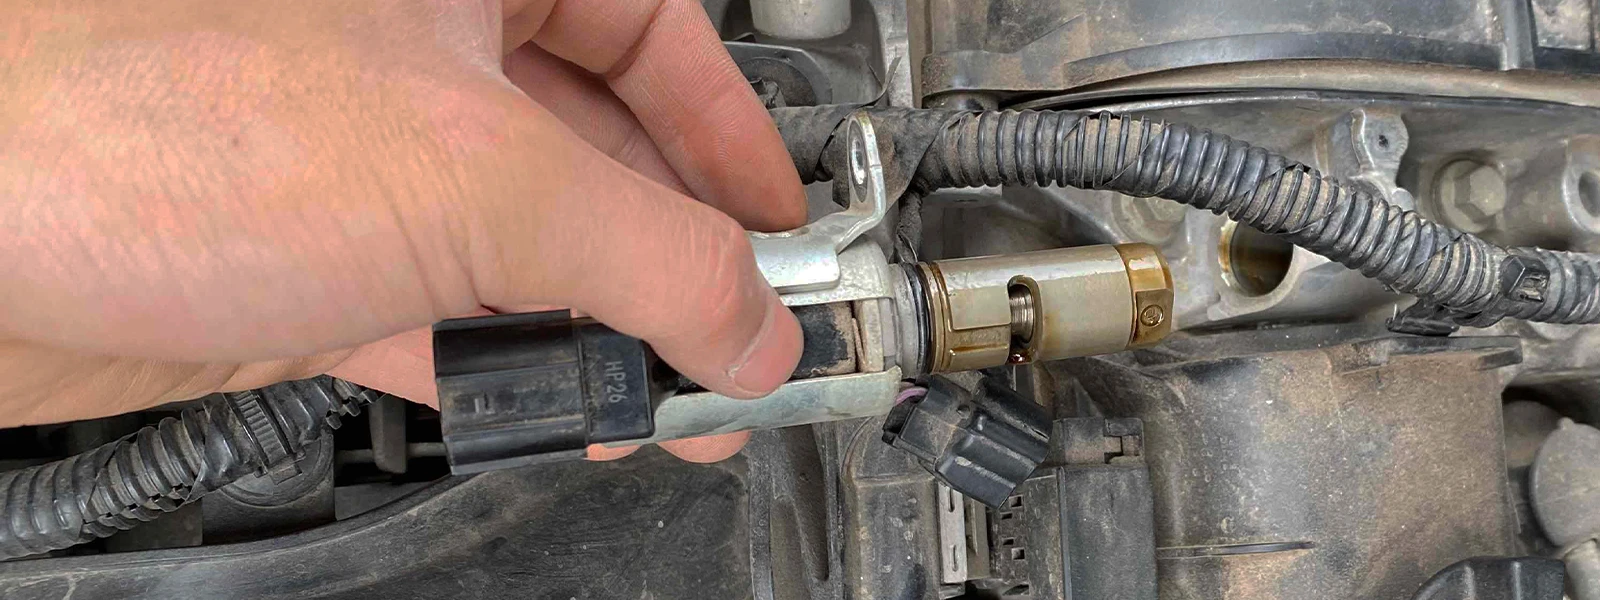
Step 3: Disconnect the Battery
For safety, disconnect the negative terminal of the battery to prevent any electrical accidents while working.
Step 4: Remove Necessary Components
If required, remove any components obstructing access to the sensor. This may include covers, air intake components, or other parts.
Step 5: Remove the Old Sensor
Gently disconnect the wiring harness and any fasteners securing the old sensor. Carefully remove the sensor, noting its position for correct alignment during installation.
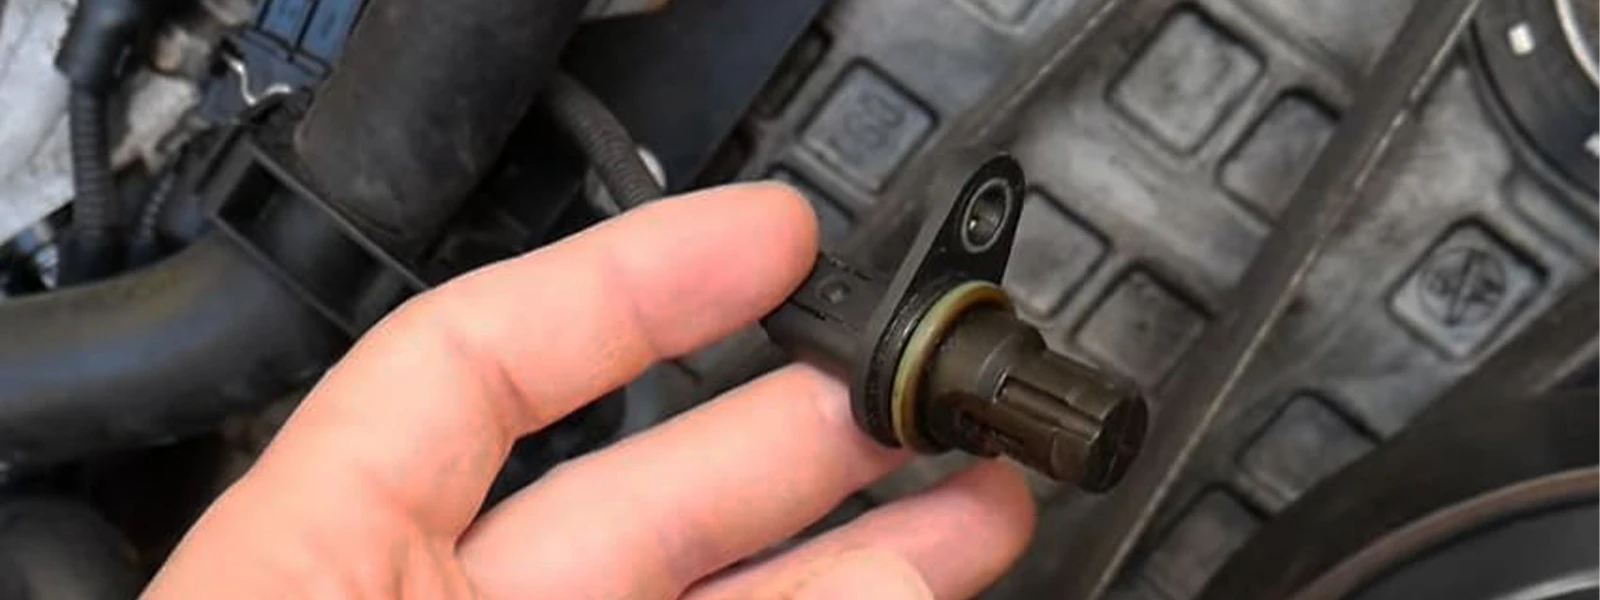
Step 6: Install the New Sensor
Position the new sensor in the same orientation as the old one. Secure it in place using the provided fasteners, ensuring a snug fit.

Step 7: Reassemble Components
Put back any components you removed earlier to access the sensor. Double-check that everything is properly secured.
Step 8: Reconnect the Battery
Reconnect the negative terminal of the battery to restore power to the vehicle.
Step 9: Test the New Sensor
Start the engine and monitor its performance. Ensure that the symptoms you noticed earlier, such as rough idling or poor acceleration, have improved. If the engine runs smoothly and the symptoms are gone, the replacement was successful.
Mistakes to Avoid
There are certain mistakes that should be avoided during a crankshaft position sensor replacement to prevent unnecessary complications. First and foremost, never skip safety measures. Neglecting to disconnect the battery and wear safety gear can result in accidents. Forgetting to properly label or photograph wire connections before disconnecting them is another mistake to steer clear of. This can lead to confusion during reassembly.
Not cleaning the area before sensor replacement can introduce debris into the engine, potentially causing damage. It's crucial to adhere to the manufacturer's torque specifications when tightening fasteners. Additionally, it's a mistake to skip testing the new sensor's functionality before reassembly. Reassembling everything without confirming improvement can be counterproductive.
Always remember that a faulty crankshaft position sensor might not be the sole issue. Overlooking the possibility of other contributing factors can result in an incomplete repair. Additionally, using substandard replacement parts can lead to further complications and early failure. By avoiding these mistakes and following the recommended tips, you can ensure a smooth and successful crankshaft position sensor replacement process.


