
How To Replace A Variable Valve Timing Solenoid

Explore a quick and effective guide to replacing your vehicle's Variable Valve Timing (VVT) solenoid. hether you're a DIY enthusiast or seeking insights before visiting a mechanic, our short guide provides valuable tips for a successful replacement.
Suggested A-Premium Parts


The Variable Valve Timing (VVT) system is like the maestro of your engine's orchestra, dynamically adjusting the timing of valve movements for optimal performance and efficiency. Think of it as a conductor ensuring the perfect harmony of air and fuel combustion. At the heart of this system is the VVT solenoid, a small yet crucial component regulating oil flow. This guide focuses on replacing the VVT solenoid, a key player in maintaining your engine's precision and efficiency. Let's dive into the process and keep your engine humming smoothly.
How to tell if a VVT solenoid is bad
A faulty Variable Valve Timing (VVT) solenoid can lead to various engine performance issues. Check these common signs that may indicate a bad VVT solenoid:
- Check Engine Light (CEL): If on, use an OBD-II scanner.
- Shaky idle: Odd movements or noises at a standstill.
- Acceleration blues: Sluggish acceleration.
- Fuel economy drop: Sudden decrease in gas mileage.
- Stalling surprises: Engine stalls, especially at idle or stops.
- Engine noises: Unusual sounds like ticking or knocking.
- Morning grumbles: Difficulty starting, especially in cold weather.
- Tailpipe smoke: Excessive exhaust emissions or smoke.
Remember, these are just clues, not definitive proof. If you notice a few of these signs, it's like your car dropping hints, and it's a good idea to have a chat with your friendly neighborhood mechanic to figure out what's going on.
After diagnosing and identifying an issue with the variable valve timing solenoid, and you find it the best solution will be a new VVT solenoid, it is advisable to either have it replaced professionally or undertake the replacement yourself. In general, replacing a VVT solenoid is considered a moderate-level DIY task. Get the tools and materials to get yourself started!
Tools and materials
Refer to the following table outlining the tools and materials needed for a VVT solenoid replacement:
Tools:
· Wrench set
· Socket set
· Screwdrivers
· Pliers
· Torque wrench
· Oil filter wrench
· Jack and jack stands
· Oil drain pan
· Gloves and safety glasses
Materials
· Replacement VVT solenoid
· New gasket or O-ring (if required)
· Engine oil
· Shop towels or rags
· Threadlocker (optional)
· Cleaner or degreaser
· Funnel
Make sure to consult the service or manufacturer's manual for specific instructions and torque specifications relevant to your vehicle.
Finish your replacement step by step
- Access VVT solenoid
- Consult your vehicle's service manual to locate the VVT solenoid. It's typically positioned near the cylinder head.
- If there are engine covers, remove them to gain access.
- Disconnect battery
- Open the vehicle's hood.
- Using the appropriate wrench, disconnect the negative terminal of the battery to ensure safety during the replacement process.
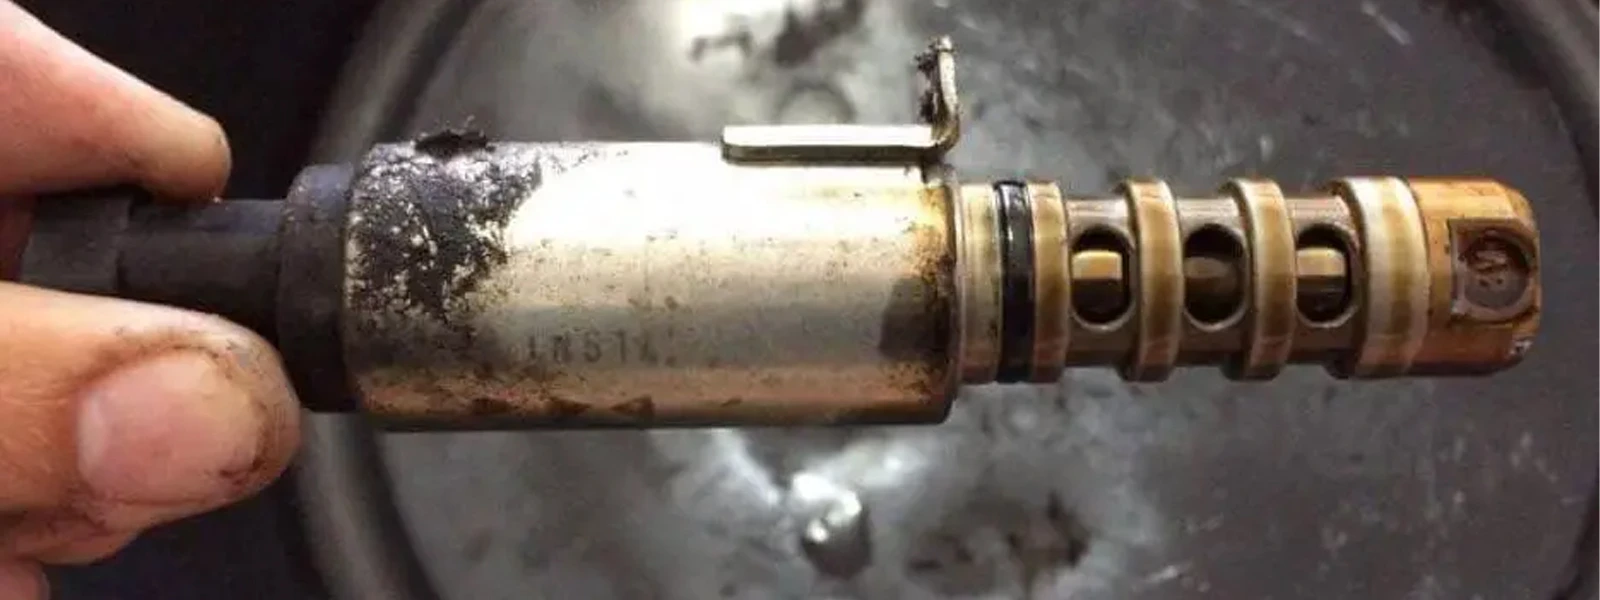
- Remove old solenoid
- Identify the electrical connector attached to the VVT solenoid and unplug it.
- Use a socket or wrench set to remove the mounting bolts securing the old VVT solenoid.
- Gently pull out the old solenoid, taking note of its position and orientation.
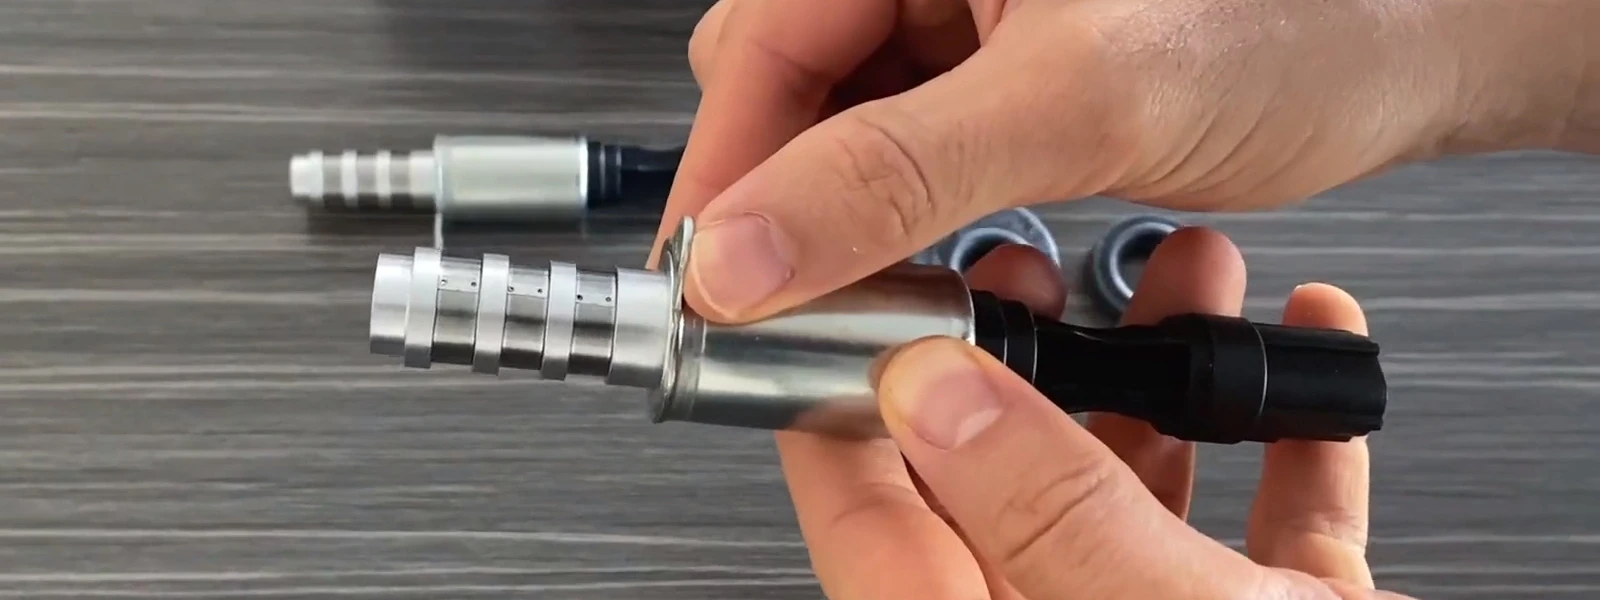
- Install new solenoid
- Align the new VVT solenoid in the same position and orientation as the old one.
- Use the torque wrench and appropriate socket to tighten the mounting bolts to the specifications provided in your service manual.
- Reconnect wires
- Plug the electrical connector into the new VVT solenoid until it clicks into place.
- Reinstall components
- If you removed any engine covers, reinstall them securely.
- Reconnect battery
- Reconnect the negative terminal of the vehicle battery and tighten the connection with the wrench.
- Check for leaks
- Start the engine and carefully inspect the VVT solenoid for any signs of oil or fluid leaks.
- Clear error codes (if needed)
- If you disconnected the battery, use a diagnostic tool to clear any error codes that may have been triggered.
- Test drive
- Take a short test drive to ensure the VVT system is operating correctly. Listen for any unusual sounds and pay attention to the engine's performance.
Ta-da! The replacement is now complete.
Tips and troubleshooting
When undertaking the replacement of a Variable Valve Timing (VVT) solenoid, it's crucial to begin by ensuring that the correct solenoid for the specific make and model of the vehicle is obtained. Reference the manufacturer's guidelines or service manual to avoid compatibility issues. Safety is paramount, so disconnecting the vehicle's battery before commencing any work is essential to prevent electrical accidents during the replacement process. Familiarity with the location of the VVT solenoid in the engine bay is key. If possible, replace associated gaskets and seals during the process to prevent oil leaks and ensure the proper functioning of the new solenoid. Lastly, adhering to the manufacturer's torque specifications when tightening bolts and fasteners is imperative to prevent over-tightening or under-tightening, which could lead to complications.
Troubleshooting VVT Solenoid Issues
- Check oil pressure: Insufficient oil pressure can affect the VVT system. Verify that the engine has proper oil pressure, and if necessary, troubleshoot and address any oil pressure issues.
- Inspect camshaft and crankshaft sensors: The VVT system relies on data from sensors. Ensure that both the camshaft and crankshaft sensors are in good condition. Faulty sensors can lead to improper VVT operation.
- Review manufacturer bulletins: Check for any technical service bulletins (TSBs) or updates from the vehicle manufacturer related to VVT solenoid issues. Manufacturers sometimes release information about common problems and solutions.
- Perform a visual inspection: Look for any signs of oil leaks around the VVT solenoid and its connections. Addressing leaks promptly prevents damage to electrical components and maintains a clean engine environment.
- Consult professional help: If troubleshooting steps do not resolve the issue or if you are unsure about the diagnosis, seek assistance from a qualified mechanic or service technician. They have the expertise and specialized tools to pinpoint and address complex problems.
Always refer to your vehicle's service manual for specific instructions and guidelines related to VVT solenoid replacement and troubleshooting for your particular make and model.


