How to Replace a Car Alternator

Alternator is a vital component that converts engine energy into electricity, powering various systems in your vehicle. Although alternators are typically reliable, regular maintenance can prolong their lifespan and help prevent unexpected failures.
A-Premium Suggested Parts

Your car's alternator is responsible for supplying electrical current to the battery and auxiliary systems. Ignoring a failed alternator can result in a dead battery or finding yourself stranded on the side of the road. Continue reading to discover the indications of a damaged alternator and learn about the basic steps involved in replacing it yourself.
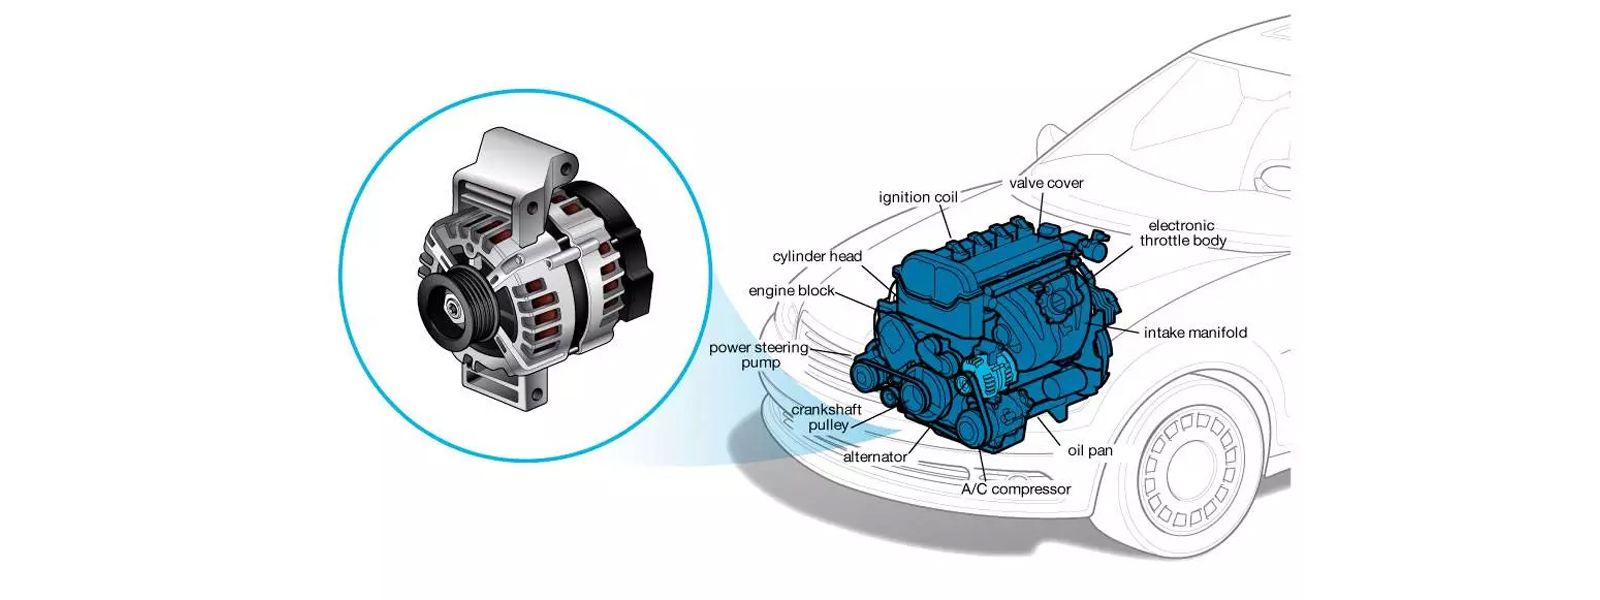
How does a car alternator work
As we are aware, the alternator plays a vital role in supplying the majority of electricity to the car and aiding in the battery's recharging process. However, to fulfill these tasks, the alternator must initially convert mechanical energy into electrical energy.
The generation of electrical energy begins with the engine.
In modern vehicles, the alternator is driven by the engine's crankshaft using a serpentine belt, while older vehicles may have a separate pulley that connects the crankshaft to the alternator. As the drive belt rotates, it imparts a high-speed spin to the rotor of the alternator within the stator.
As the rotor rotates, it generates electrical energy. The magnets placed strategically around the rotor create a magnetic field when they pass over the copper wiring in the stator. This magnetic field induces a voltage in the stator, capturing the generated power. The voltage regulator then receives this power and controls its distribution to the vehicle, while also regulating the voltage that is supplied to the battery.
Discover how the alternator charges the car battery.
Before the battery can utilize the power supplied by the alternator, it needs to be converted into a format compatible with the battery. This is because electricity can flow in different currents and directions. Car batteries operate on direct current (DC), which flows in a single direction, while alternators produce alternating current (AC), which periodically changes direction. Therefore, the power intended for the battery passes through a diode rectifier before reaching the voltage regulator, converting it into DC. Once the conversion is complete, the battery can effectively utilize the power to recharge.
6 signs of a bad alternator to watch out
- Dimming or Flickering Lights: Headlights, interior lights, or dashboard lights dimming or flickering while driving can be a sign the alternator isn't generating enough power.
- Battery Warning Light: A lit battery warning light on your dashboard is a clear indicator of a potential alternator issue, as it monitors the charging system.
- Weak or Dead Battery: A failing alternator can lead to an undercharged or dead battery, causing difficulty starting your car or repeated battery replacements.
- Electrical Problems: Malfunctioning alternators can disrupt various electrical components. This might manifest as slow power windows, erratic radio behavior, or malfunctioning electronics.
- Strange Noises: Unusual grinding, whining, or squealing noises from the front of your engine could be a failing alternator bearing, belt, or internal component.
- Burning Smells: A damaged alternator belt or overheating alternator can produce a burning rubber or electrical odor. Don't ignore these warning signs - get your car checked immediately.

If you notice any of these signs, it's advisable to have your vehicle inspected by a qualified mechanic to diagnose and address the alternator problem promptly.
How to replace your alternator
- Tools and safety precautions
Tools you may need:
- Ratchets, sockets, and wrenches
- Belt tensioner tool
- Gloves and safety gear
- Battery tender or memory saver
- Jack, jack stands, and wheel chocks
Before you start disassembling anything, make sure you’re doing it safely. Disconnect the car’s battery to prevent electrical shocks, and always wear safety glasses and gloves to protect yourself from potential hazards. Exhaust fumes can be harmful, so ensure proper ventilation when working in an enclosed space.
- Step-by-step alternator replace
To replace an alternator, follow these steps:
1. Disconnect the negative battery cable: Begin by disconnecting the negative (ground) battery cable to ensure safety and prevent electrical shorts. Ensure that the ignition is turned off, and cover the negative battery terminal to avoid any accidental contact.
2. Locate the alternator and inspect related components: Find the alternator, typically mounted at the front or side of the engine. If access requires going underneath the vehicle, use a hydraulic jack, jack stands, and wheel chocks to lift the vehicle safely.
Take the opportunity to inspect other components of the starting and charging system:
Drive Belt and Tensioner: Look for signs of wear, cracks, or excessive slack in the belt. Check the tensioner for proper operation to ensure the belt remains taut.
Examine Electrical Connections: Visually inspect the pigtail connector (the plug connecting the alternator's wiring harness) for any damage or corrosion.
Verify B+ Voltage Wire: Ensure the B+ terminal wire (positive battery cable) is secure and free of corrosion at the connection point.
Check for Alternator Contamination: Clean any dirt, debris, or oil buildup on the alternator housing. This can help prevent overheating and ensure optimal performance
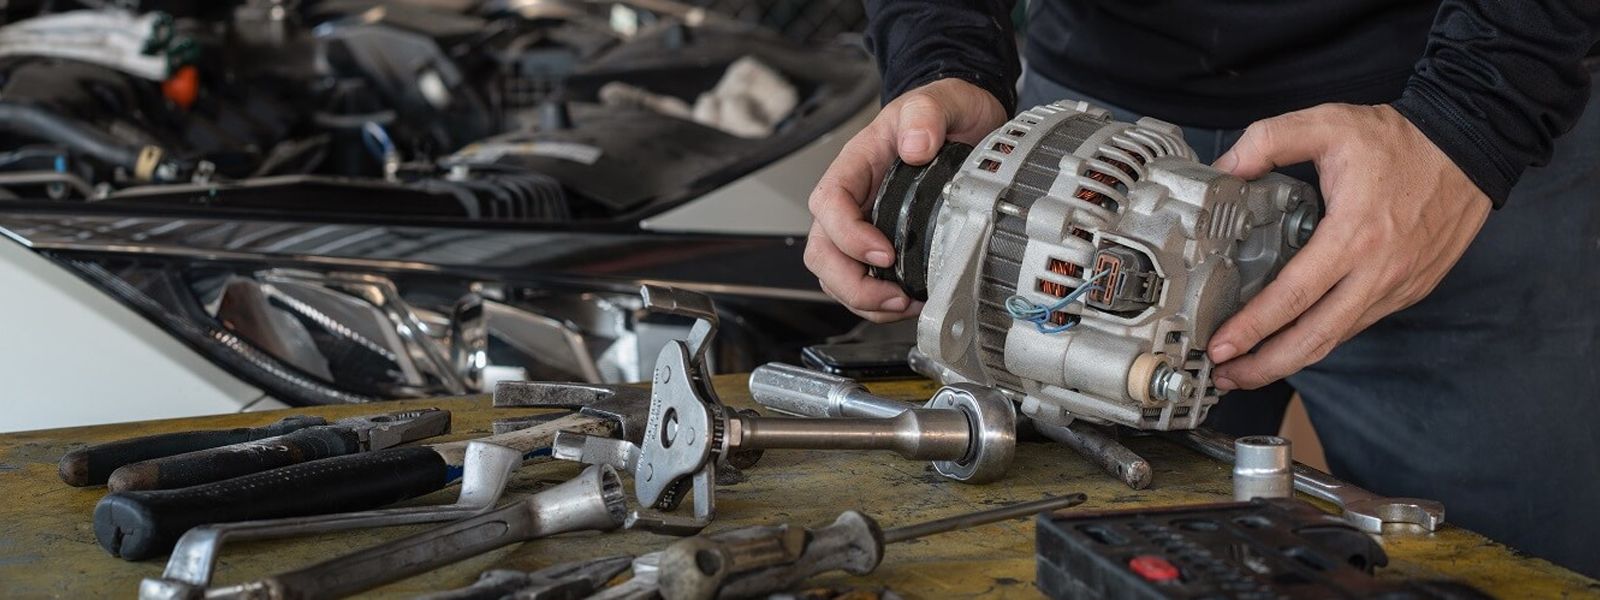
3. Remove the alternator and match it up: Disconnect and remove the electrical connections, drive belt, and any interfering items. Then, unbolt the old alternator from the engine and mounting brackets. Compare the old alternator to the replacement unit, ensuring that the electrical connector plug-in position and design match. Pay attention to the position of the alternator mounting bolt holes.
4. Install the alternator: Carefully align the working alternator mounting holes and install the mounting bolts and nuts. Ensure all the bolt and/or nut threads are started and tighten them evenly. On some vehicles, the electrical connections will need to be installed first before permanently tightening the alternator for access reasons.
Place the drive belt in position and ‘rotate’ the belt tensioner so the belt can be installed. You may need to refer to the under-hood belt routing diagram or consult the repair guide. Due to tight clearances between the pulleys, it is usually best to place the belt onto the pulley(s) that have ' a ' lip’(usually the grooved type) and slip the belt onto the final pulley without a ‘lip’ (usually the smooth type).
Tighten the alternator mounting bolts evenly. Double-check all electrical connections and ensure they are secure. Inspect the work area to ensure nothing is left loose or disconnected.
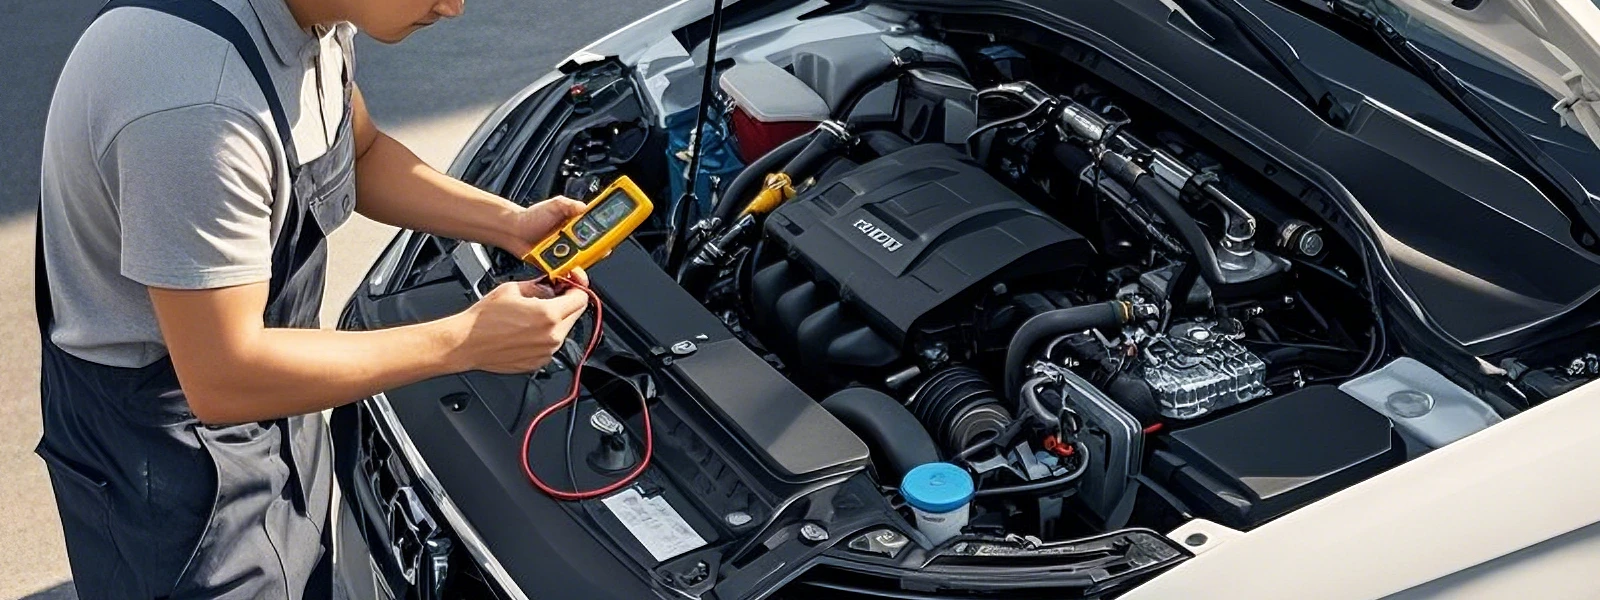
5. Reconnect the battery and test the charging system: Reconnect the negative battery cable to the battery terminal, making sure it is tightly secured. Start the vehicle and let it idle. Use a multimeter to measure the voltage across the battery terminals. The reading should be around 13.5 to 14.5 volts, indicating proper charging by the alternator.
Note: Remember to consult the vehicle's repair manual for detailed instructions and safety precautions specific to your vehicle.
Maintenance of your car alternator
Your car's alternator is a silent but crucial workhorse, responsible for converting mechanical energy from the engine into electricity that powers everything from your headlights to your radio. While alternators are generally reliable, regular maintenance can extend their lifespan and prevent unexpected breakdowns. First, you can regularly check the alternator for damage, such as cracks or corrosion, and listen for noises that pay attention to unusual sounds coming from the alternator area. Then you can check the Drive Belt to ensure the belt is properly tensioned and free of wear. Finally, maintain the alternator cleanliness that keeps the alternator housing clean from dirt and debris.


