What is a CV Joint on a Car?

The CV (Constant Velocity) joint is an important part of the car's drivetrain. It transfers power from the engine to the wheels. It also allows the wheels to move up and down. The joint is located at both ends of the axle.
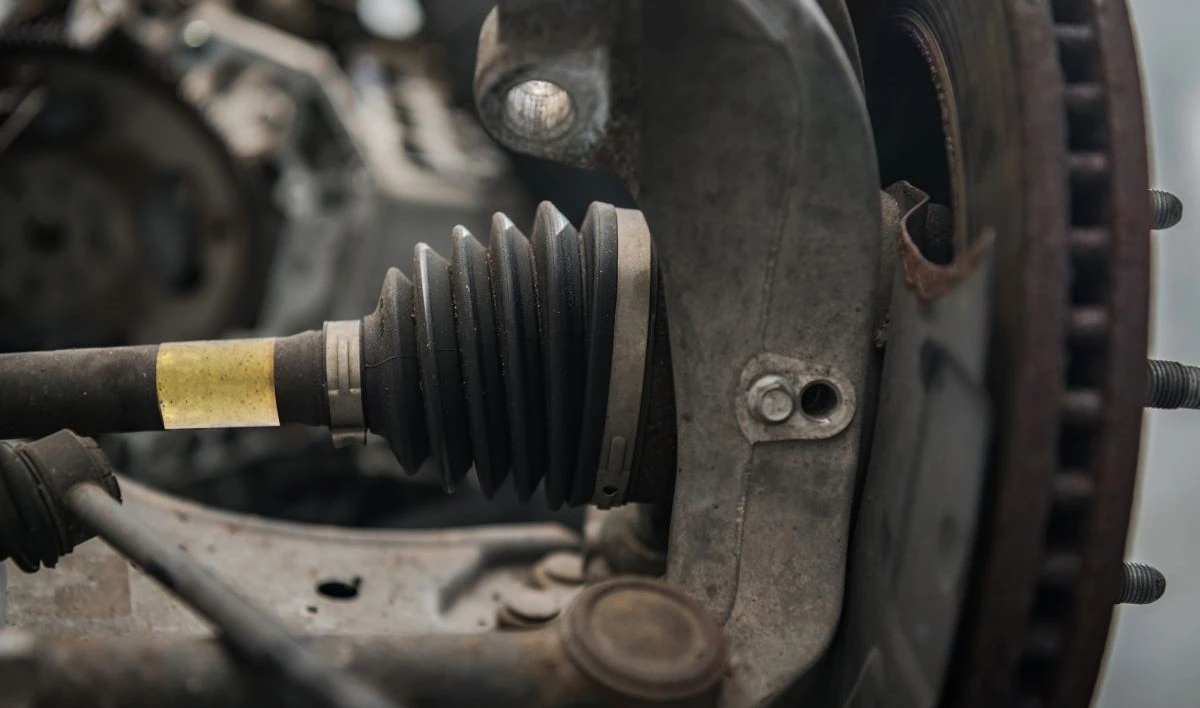
The CV (Constant Velocity) joint is an important part of the car's drivetrain. It transfers power from the engine to the wheels. It also allows the wheels to move up and down. The joint is located at both ends of the axle. It connects the driveshaft to the wheels. The joint can adjust to changes in angles when turning. This is important for front-wheel and all-wheel drive cars. The wheels in these cars turn at different angles. The CV joint helps prevent power loss and instability. Over time, dirt, moisture, and constant use can wear out the joint. This affects its performance. Regular inspection and timely grease replacement can keep the joint working well.

5 Symptoms of a Bad CV Joint
1. Clicking or popping noises
A common sign of a bad CV joint is clicking or popping noises when turning. These sounds happen when the parts inside the joint wear out and stop working right. The problem is more noticeable at low speeds. If you do not fix it, the CV joint may fail completely and cause more damage to the car's drivetrain.
2. Vibrations or shaking
A damaged CV joint can cause vibrations. You may feel them in the steering wheel, floorboard, or throughout the car. This is especially true when driving at higher speeds. The uneven wear in the joint causes an imbalance. This disrupts the smooth rotation of the axle. As a result, the ride becomes unstable. If the issue continues, it can affect how the vehicle handles. The car may become harder to control.
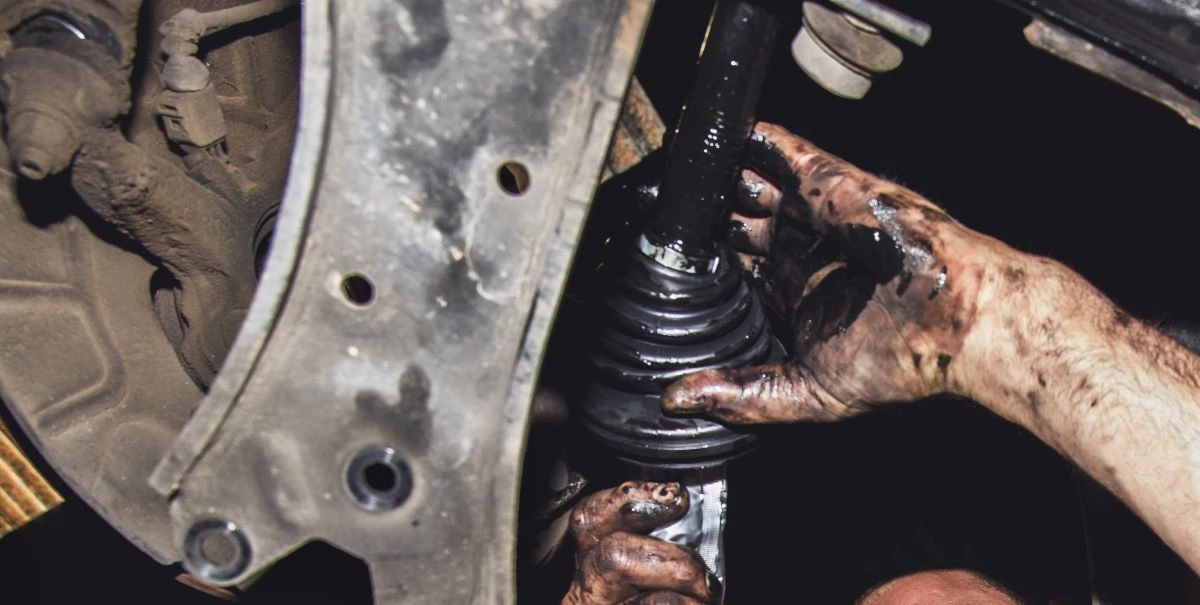
3. Grease leaks
If the rubber boot around the CV joint cracks or tears, grease can leak out. Dirt or moisture can then enter the joint. This will harm the lubrication and protection of the CV joint. The joint will wear out faster. If you see grease leaking near the wheel, the joint needs attention. If you do not fix it, the damage may get worse.
4. Steering problems
A worn or damaged CV joint can cause steering problems. The steering wheel may feel harder to turn. It may need more effort, especially when driving slowly or making sharp turns. In some cases, the car may pull to one side. This makes it hard to keep the car going straight.
5. Clunking sounds when accelerating
Clunking noises during acceleration or deceleration can indicate a bad CV joint. These sounds happen when the joint cannot transfer power from the engine to the wheels properly. As a result, the car may jerk or hesitate. This is especially noticeable when changing speeds. If not fixed, this problem can cause more stress on the drivetrain.

What Happens When a CV Joint Fails?
1. Loss of power transmission
When a CV joint fails, it causes a loss of power transmission from the engine to the wheels. The CV joint transfers torque from the engine to the wheels. This allows your car to move. A complete failure of the CV joint stops the vehicle from moving forward or backward. If the CV joint breaks or disconnects, the vehicle cannot move at all.
2. Dangerous driving conditions
Driving with a broken CV joint is dangerous. The car will act unstable, especially when turning, speeding up, or stopping. The steering can become uneven. The car may also make strange noises or shake. If the CV joint breaks enough to make the axle snap or fall off, the wheel could come off. This could lead to a serious accident. Both the driver and passengers would be at risk.
3. Damage to other components
If a CV joint fails and is left unaddressed, other critical components in your vehicle’s drivetrain could be damaged. When power transfer is interrupted, parts like the differential, transmission, or gearbox may suffer undue stress or wear, causing additional failure. Over time, the damage could extend to suspension components or even the engine itself, leading to further mechanical issues that will escalate repair costs. Promptly addressing a CV joint failure can prevent more extensive and expensive damage to these connected parts.
4. Costly repairs
Repairing a broken CV joint can be costly. If the failure damages other parts of your car’s drivetrain, the cost can go up. Waiting to fix the problem makes the damage worse. This can lead to bigger repairs, like fixing the gearbox or transmission. These repairs are also expensive. Replacing the CV joint early can help you avoid high repair costs.

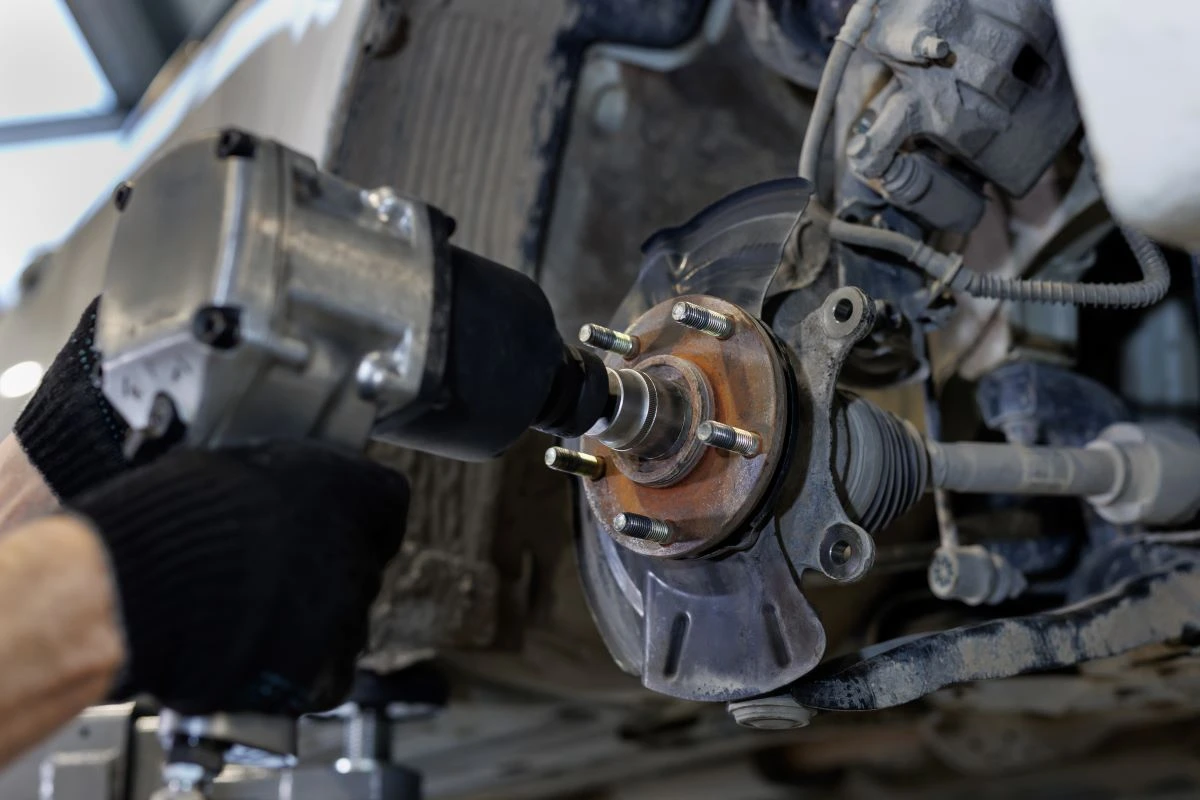
How to Replace a CV Joint
1. Lift the vehicle
First, lift the vehicle safely. Use a car jack to raise the car. Then, secure it with jack stands. This is important for safety and accessibility. You will need to reach the wheel well and the suspension system. Make sure the vehicle is on a flat surface. Check the jack stands to ensure they are stable.
2. Remove the wheel
Once the vehicle is lifted, remove the wheel. Use a wrench to loosen the lug nuts. It is easier to do this while the vehicle is still on the ground. This way, you can apply more torque. After loosening the nuts, remove the wheel. This will expose the CV joint and axle.
3. Disconnect the axle from the vehicle
You need to disconnect the axle from the vehicle. Depending on your car’s make and model, you may need to remove other parts, such as brake components or suspension parts, to reach the CV joint. Keep track of the parts you remove. Label or store them so you can put them back later. Make sure all connections are completely detached before you move on.
4. Remove the old CV joint
With the axle exposed, remove the old CV joint. You may need a puller tool or hammer to loosen the joint from the axle. Be careful not to damage the axle or nearby parts. If the axle is damaged, replace it before installing the new CV joint. Once the old joint is off, check the axle and nearby areas for any signs of wear or damage.
5. Install the new CV joint
Now, you can install the new CV joint replacement. Align it properly with the axle and securely fasten it. Before sealing the joint inside the protective boot, apply a generous amount of grease to ensure smooth operation. The joint should be tightly secured, as improper installation can lead to future failure. If necessary, use a rubber mallet to gently tap the joint into place without causing any damage.
6. Reassemble and test
Once the new CV joint is in place, begin reassembling the parts you removed. Make sure the axle and all other parts are properly connected. Lower the vehicle to the ground when everything is back in place. Test drive the vehicle to check if the joint works correctly. Listen for any strange sounds or vibrations. These may signal a problem with the installation or damage.


